Create a Newsletter Sign Up FormUsing Gatsby, Mailchimp, and reCAPTCHA
Written by Hendrik. May 23, 2021
178
13 min read

Your Blog's Subscribe Button
If you have a blog, but don't have a way for readers to sign up for your newsletter, then do you really have a blog? Having a newsletter to sign up to is like adding a subscribe button to your blog.
Step-by-step, we'll be looking at how to create a newsletter signup form using Gatsby, Mailchimp, reCAPTCHA, and Netlify.
Table of Contents
- Set Up Mailchimp
- Set Up Gatsby To Use Mailchimp
- Add Google reCAPTCHA
- Implement the Frontend
- Deploy to Netlify
- Troubleshooting and Problems
Set Up Mailchimp
Assuming that you have a Mailchimp account set up, the first thing we'll need is the Mailchimp endpoint where we will later be sending the user's input information to.
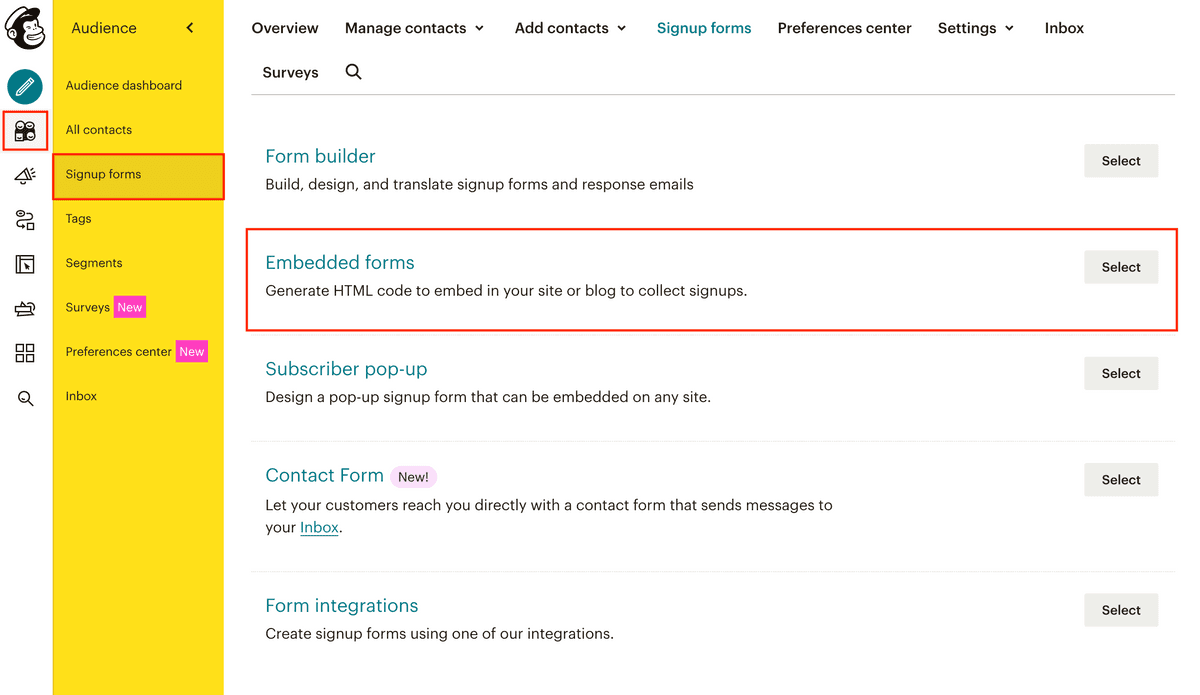
Navigate to your audience, select "signup forms", and then "embedded forms".
Within the "copy/paste onto your site" box, find the HTML element <form action="...">. Extract the endpoint within the action (without the apostrophes). We'll be using this later.
Set Up Gatsby To Use Mailchimp
We can now configure Gatsby to use our endpoint.
Install Mailchimp Plugin for Gatsby
We'll be using the Gatsby Mailchimp plugin in order to configure Gatsby with our Mailchimp endpoint. Install the package by running npm i gatsby-plugin-mailchimp.
Create An Environment Variable
In order to be able to use your Mailchimp endpoint, you'll have to add it to the Gatsby configuration. I recomment not hard coding the endpoint into your gatsby-config. Instead, create a file named .env in the root of your project, if you don't already have one. Make sure to also add this file to your .gitignore. You don't want to be pushing secrets into your repository.
Once you've created the .env file, add the following line to it MAILCHIMP_SIGNUP=<your endpoin>. If your Gatsby application was running while adding the variable, then you'll have to restart the server.
In order to now use this environemnt variable in your project, you'll have to install dotenv as follows: npm install dotenv.
Add Environment Variable To the Configuration
We now want to tell Gatsby to use the Mailchimp endpoint. Add the following block of code to the top of you gatsby-config.js file.
const { NODE_ENV } = process.envrequire("dotenv").config({path: `.env.${NODE_ENV}`,})
This loads the environment variables into the configuration and allows us to access their values. How Gatsby handles .env variables is explained in further detail here, if you're interested.
We can now access the variable and set our endpoint using process.env.<variable name>.
{resolve: "gatsby-plugin-mailchimp",options: {endpoint: process.env.MAILCHIMP_SIGNUP,timeout: 3500,},}
That's all that's required to setup our Mailchimp endpoint.
Add Google reCAPTCHA
Having an input form out on the internet requires a bit of care in order to avoid spam or other misuse. We don't want bots signing up for our newsletter and filling up our audience with fake emails. In order to avoid this, it is a good idea to add something like a reCAPTCHA before submitting the user's input to our Mailchimp endpoint. Mailchimp even recommends using a reCAPTCHA to minimize fake signups.
In order to be able to use reCAPTCHA, you'll need an account. We'll be using a v2 Checkbox in this tutorial. We'll be needing the site key later, so make sure to save it somewhere where you can copy it again later.
We'll also need to install the React reCAPTCHA package. Simply run npm i react-google-recaptcha.
Local Development
In order to develop and test your reCAPTCHA locally, you can use the local site key that they provide. Add this as a further environment variable in your .env file like so GATSBY_RECAPTCHA_SITE_KEY=6LeIxAcTAAAAAJcZVRqyHh71UMIEGNQ_MXjiZKhI. Our actual site key will be added to the production environment later on in Netlify.
Finally, everything is set up for us to start locally implementing everything into our frontend.
Implement the Frontend
We're finally at the fun part: implementing everything in our frontend. Although the design of your frontend will be different than mine, the basic requirements of an input field, submit button, reCAPTCHA component, handler functions, and state changes will be roughly the same.
My blog only requires a user input their email, however, if you wanted to, you can also ask for more information, such as a user's name or date of birth.
Adding an Input Field and Submit Button
I've been using Chakra UI as of late, and will be creating the following components using their library. In order to handle the submit form, React Hook Forms serves well.
If you don't have either, first run the following to install both.
npm i @chakra-ui/react @emotion/react@^11 @emotion/styled@^11 framer-motion@^4
npm i react-hook-form
We'll be using the following Chakra UI and React Hook Form imports for the main components. We can also import the Mailchimp and reCAPTCHA components.
import {Input,Heading,Text,Alert,AlertIcon,CloseButton,Button,} from "@chakra-ui/react"import { useForm } from "react-hook-form"import addToMailchimp from "gatsby-plugin-mailchimp"import ReCAPTCHA from "react-google-recaptcha"
React Hook Forms needs to be set up with the following block of code within the function component
const {register,handleSubmit,formState: { errors },} = useForm()
At its core, we need an input field, a submit button, and a form wrapper around all of these to handle submission. Our component can return the following to achieve this.
<form onSubmit={handleSubmit(onSubmit)} noValidate={true}><Inputplaceholder="Email"type="email"id="email"{...register("email", {required: "required",pattern: {value: /\S+@\S+.\S+/,message: "Entered value does not match email format",},})}/>...<Button type="submit">Sign Up</Button></form>
We will be implementing the onSubmit handler function in a bit. So far, everything should seem rather staright forward. The Input field has an automatic validation which returns an error message if the input does not conform to an email.
Adding the reCAPTCHA Component
The next step would be to add the reCAPTCHA component. Because a reCAPTCHA validation form is not the prettiest thing to have on your site, you can choose to conditionally render it. This will require saving a boolean value in the component's state in order to decide whether or not it should render.
const [showRecaptcha, setShowRecaptcha] = useState<boolean>(false)
We can now add the reCAPTCHA component to our return block and fill in the necessary values from out .env file.
{showRecaptcha && process.env.GATSBY_RECAPTCHA_SITE_KEY && (<ReCAPTCHAsitekey={process.env.GATSBY_RECAPTCHA_SITE_KEY}onChange={handleRecaptcha}/>)}</form>
The reCAPTCHA component will only render if the submit button toggled the showRecaptcha value to true and if the environment variable is not null.
Adding the Handler Functions
The default value for the reCAPTCHA state is false, meaning it will not render by default. That means that the handler function for the submit button will have 2 responsibilities. The first is to set the showRecaptcha to true and the second is to save the user's input email into its own state.
The submit button will not actually be responsible for submitting user information. Rather, it will render the reCAPTCHA component, which is then responsible for submitting the user information to the mailchimp endpoint.
Let's first add another state to handle the email input.
const [userEmail, setUserEmail] = useState<string | null>(null)
The default value for the email is null and will be set by the submitHandler, from the submit button, which can be as follows:
const onSubmit = async ({ email }) => {setUserEmail(email)setShowRecaptcha(true)}
So, once a user inputs their email and submits, the above function is called and sets the email address and allows the reCAPTCHA to be rendered.
Next, the handler function for when the user then successfully fills out the reCAPTCHA needs to be implemented.
const handleRecaptcha = async () => {try {await addToMailchimp(userEmail)} catch (e) {// Potential error handling}}
Using the email that we set in our component's state, we can call the addToMailchimp function we imported earlier, which sends the the containing information to our Mailchimp endpoint.
The basic user flow should now work. A user can input their email and click the submit button. If the input value does not conform to the email regex, it will return an error, otherwise the reCAPTCHA will be rendered. Once that's also been filled out successfully, the input information will be sent to the endpoint and a user will be signed up to our audience.
Fine Tuning
Currently, the user inputing their information receives no feedback as to whether or not they successfully signed up or not. React Hook Forms allows for excellent error handling and is easy to implement. It might also be worth while to add a third state to the component, which either renders a success or error dialog after the reCAPTCHA. However, going into these details would exceed the scope of this blog post.
We can now get things ready for deployment.
Deploy to Netlify
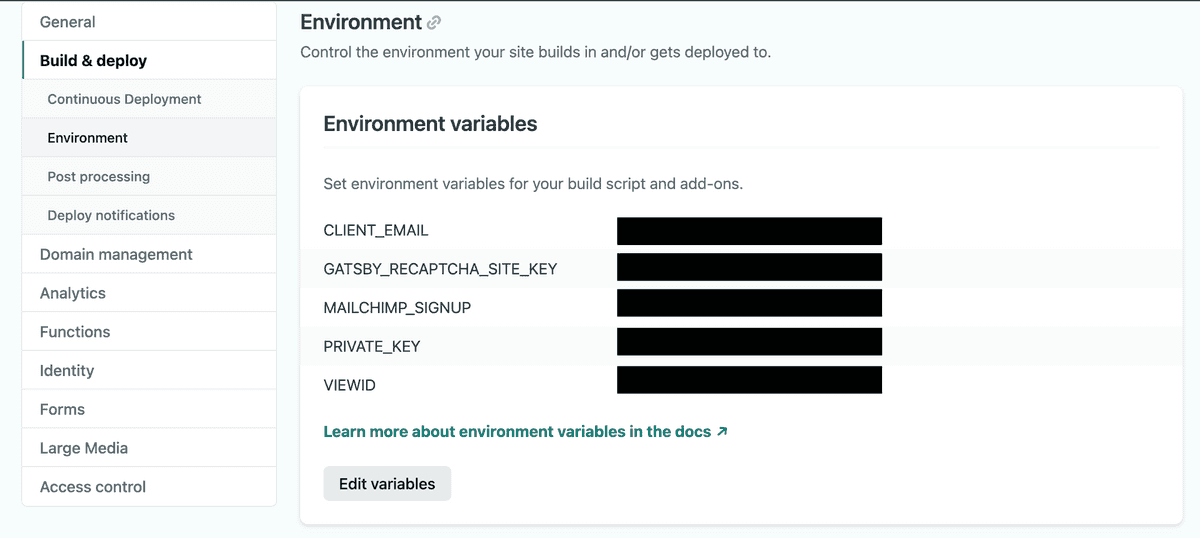
Keep in mind that, currently, our environment variables are only used in local development, because we're (hopefully) not pushing the .env file to our repository. Before we push our changes and deploy to Netlify, we will have to make sure to add the same variables to the Netlify deploy environment.
In Netlify, under you site settings, add the Mailchimp environment variable exactly as it is in your .env file. Also add the name of the reCAPTCHA environment variable, but make sure to now insert your actual site key, and not accidentally insert the local development site key!
Everything should now be set up and work when you deploy your new changes.
Troubleshooting and Problems
While developing locally, if reCAPTCHA is displaying an error in the validation box stating "Localhost is not in the list of supported domains for this site key.", then make sure to use the correct site key for local development as stated above. The actual reCAPTCHA site key will not work when developing locally.
If you think that the environment variables might not be loading into your gatsby-config properly, you can try console.logging the individual errors before the module.exports block. If the variables are set properly, they should be logged in your command line as soon as you run your server with npm start.

Thanks for reading my post. I’d love to get feedback from you, so feel free to shoot me a tweet!
- Hendrik


